Create IAM Role
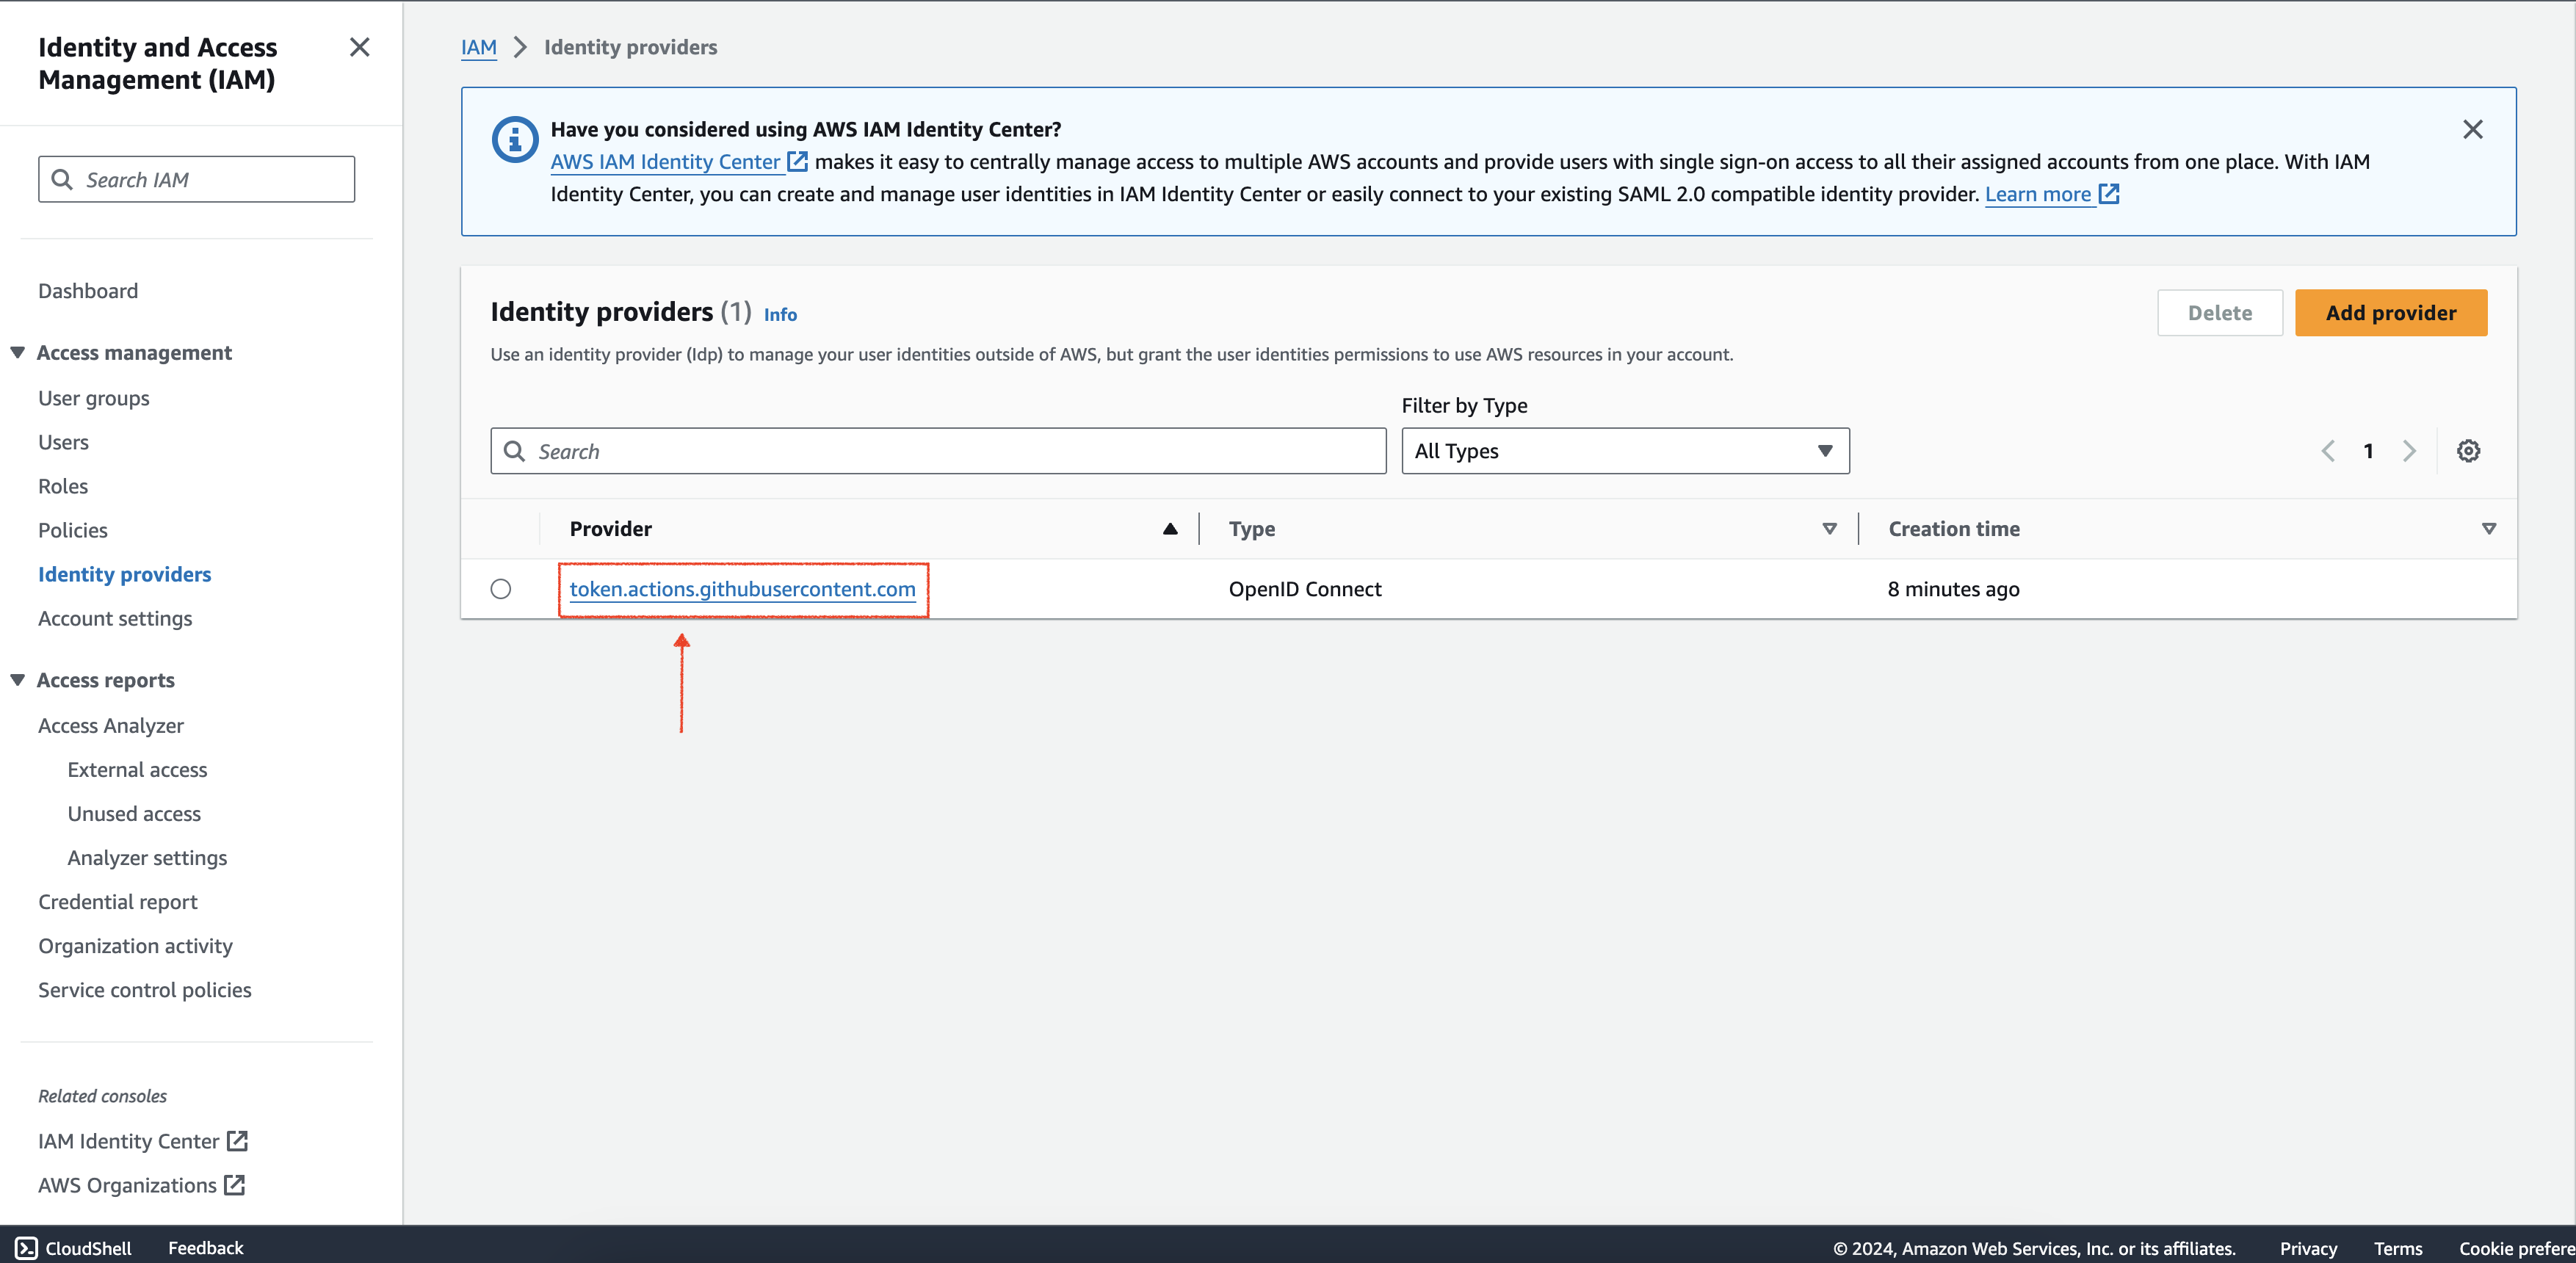
- In the Identity Providers choose the Provider we just created
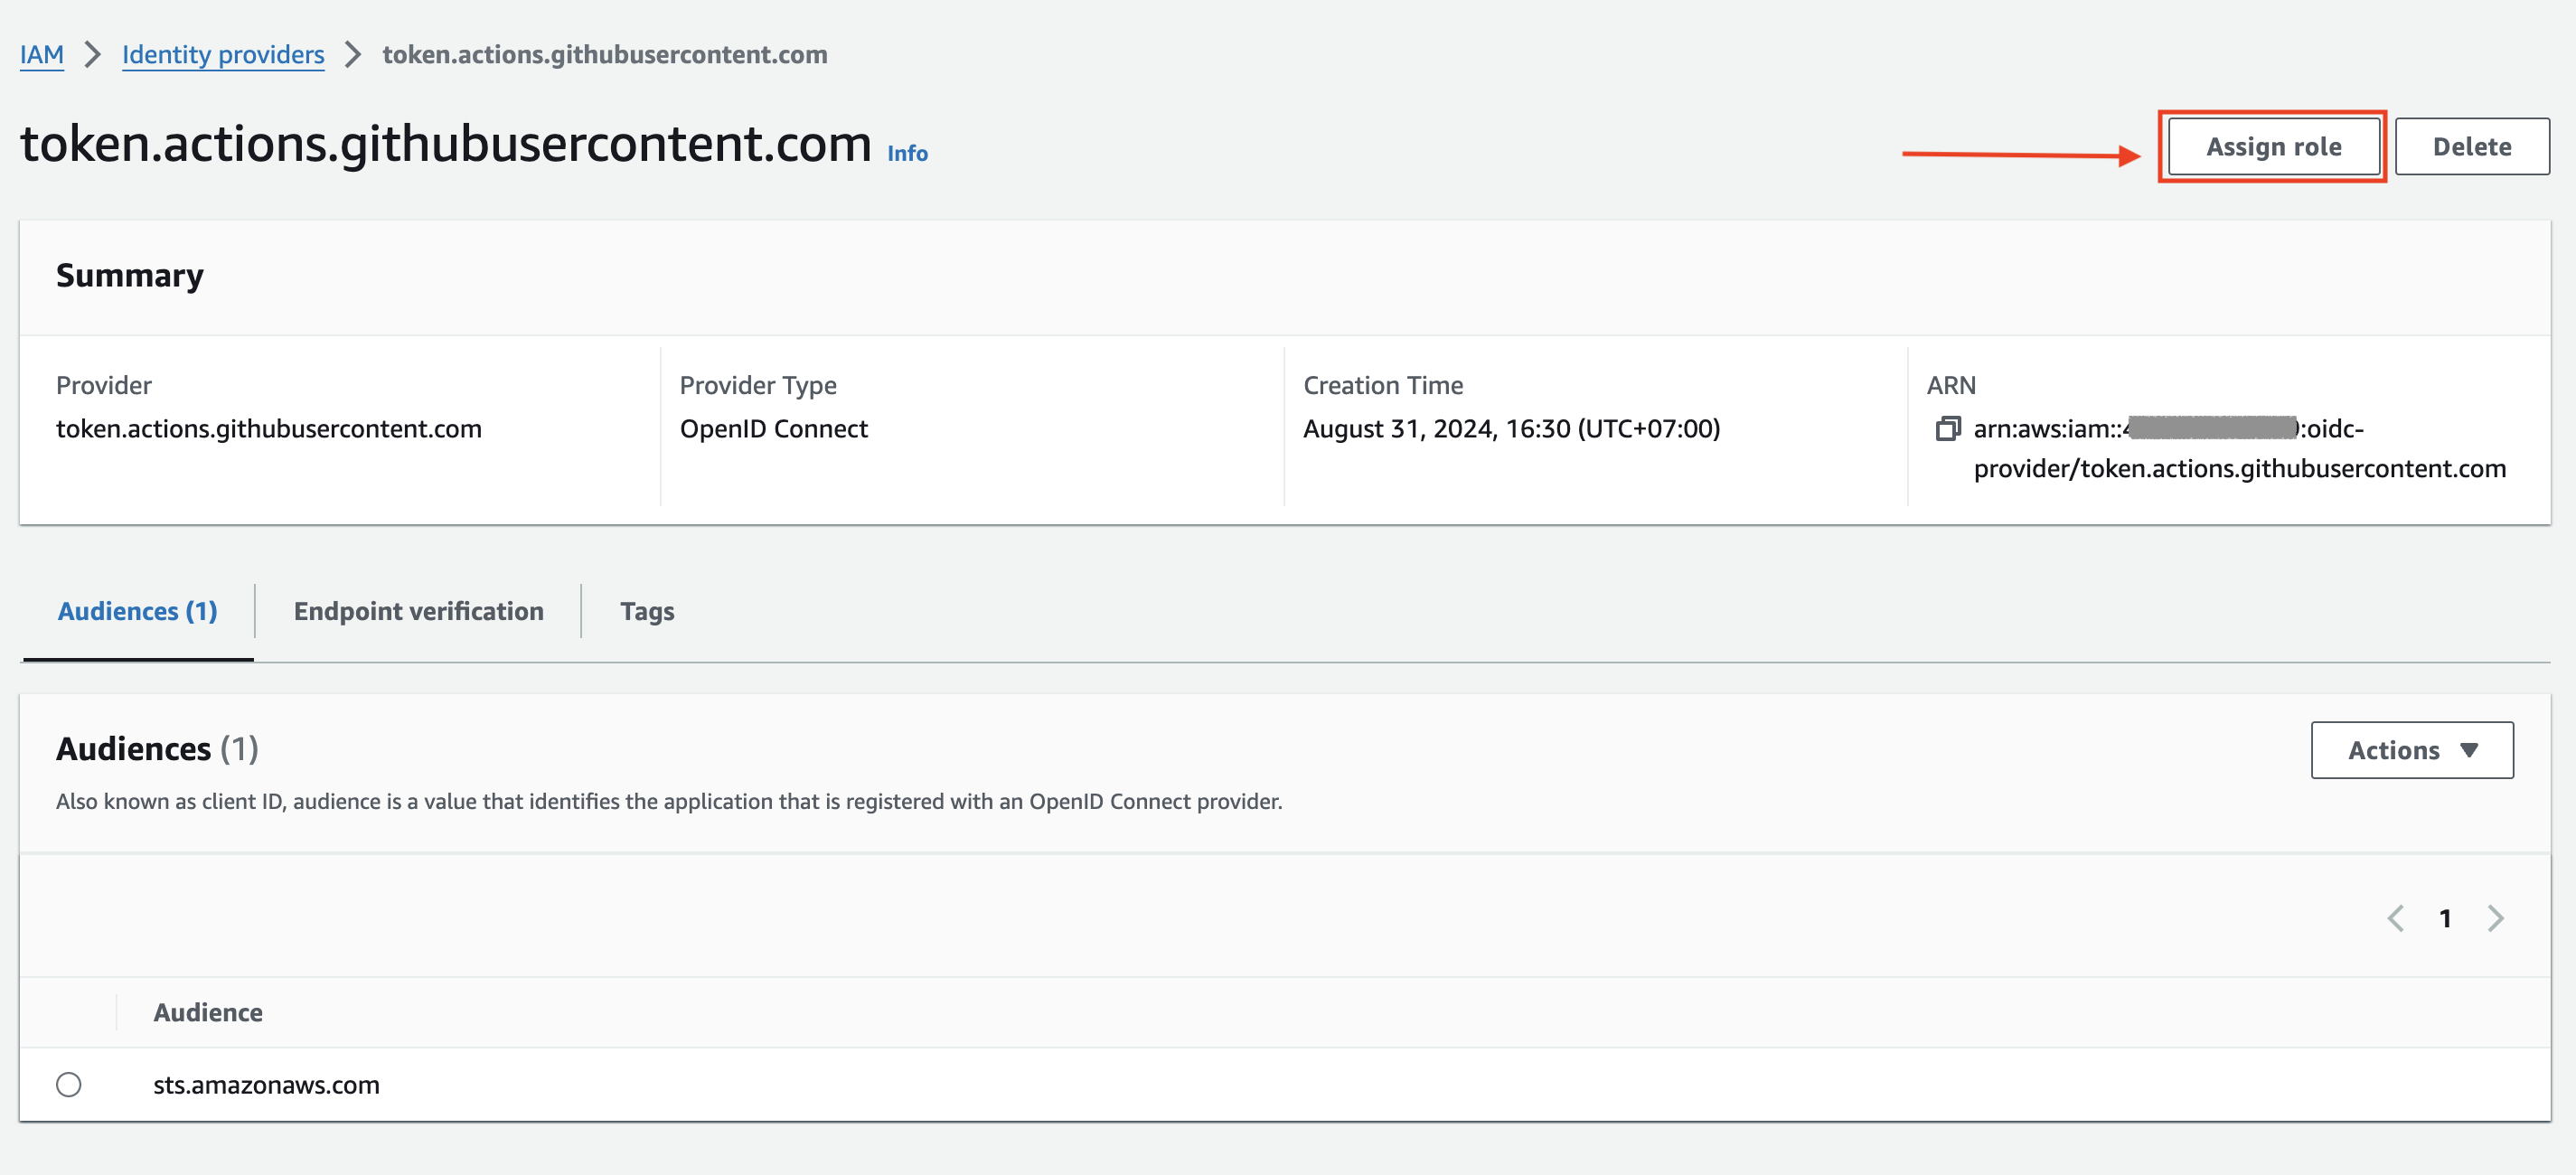
- Choose “Assign role”
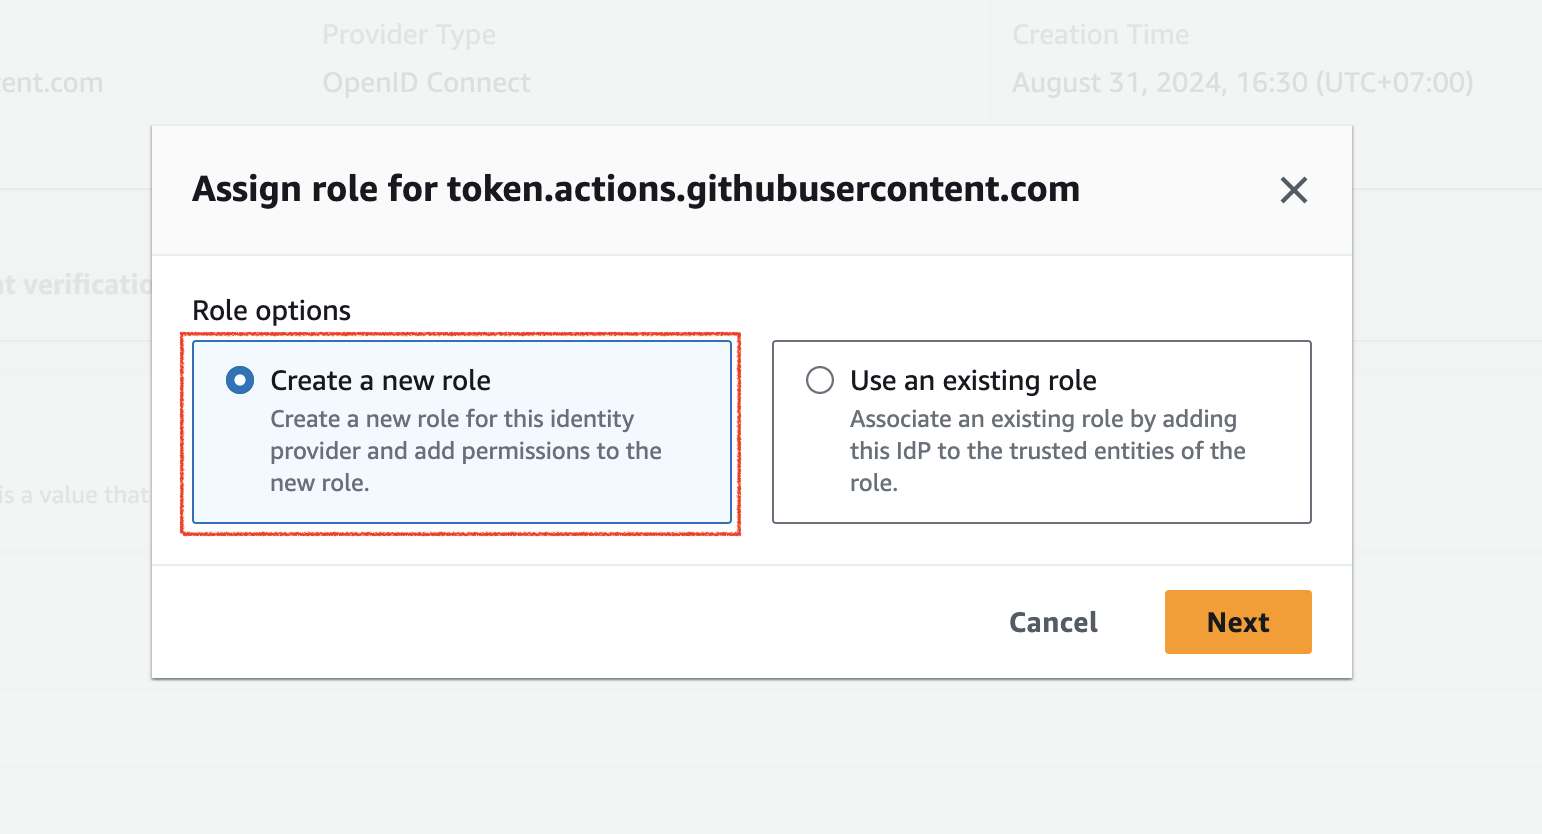
- Choose “Create a new role” -> “Next”
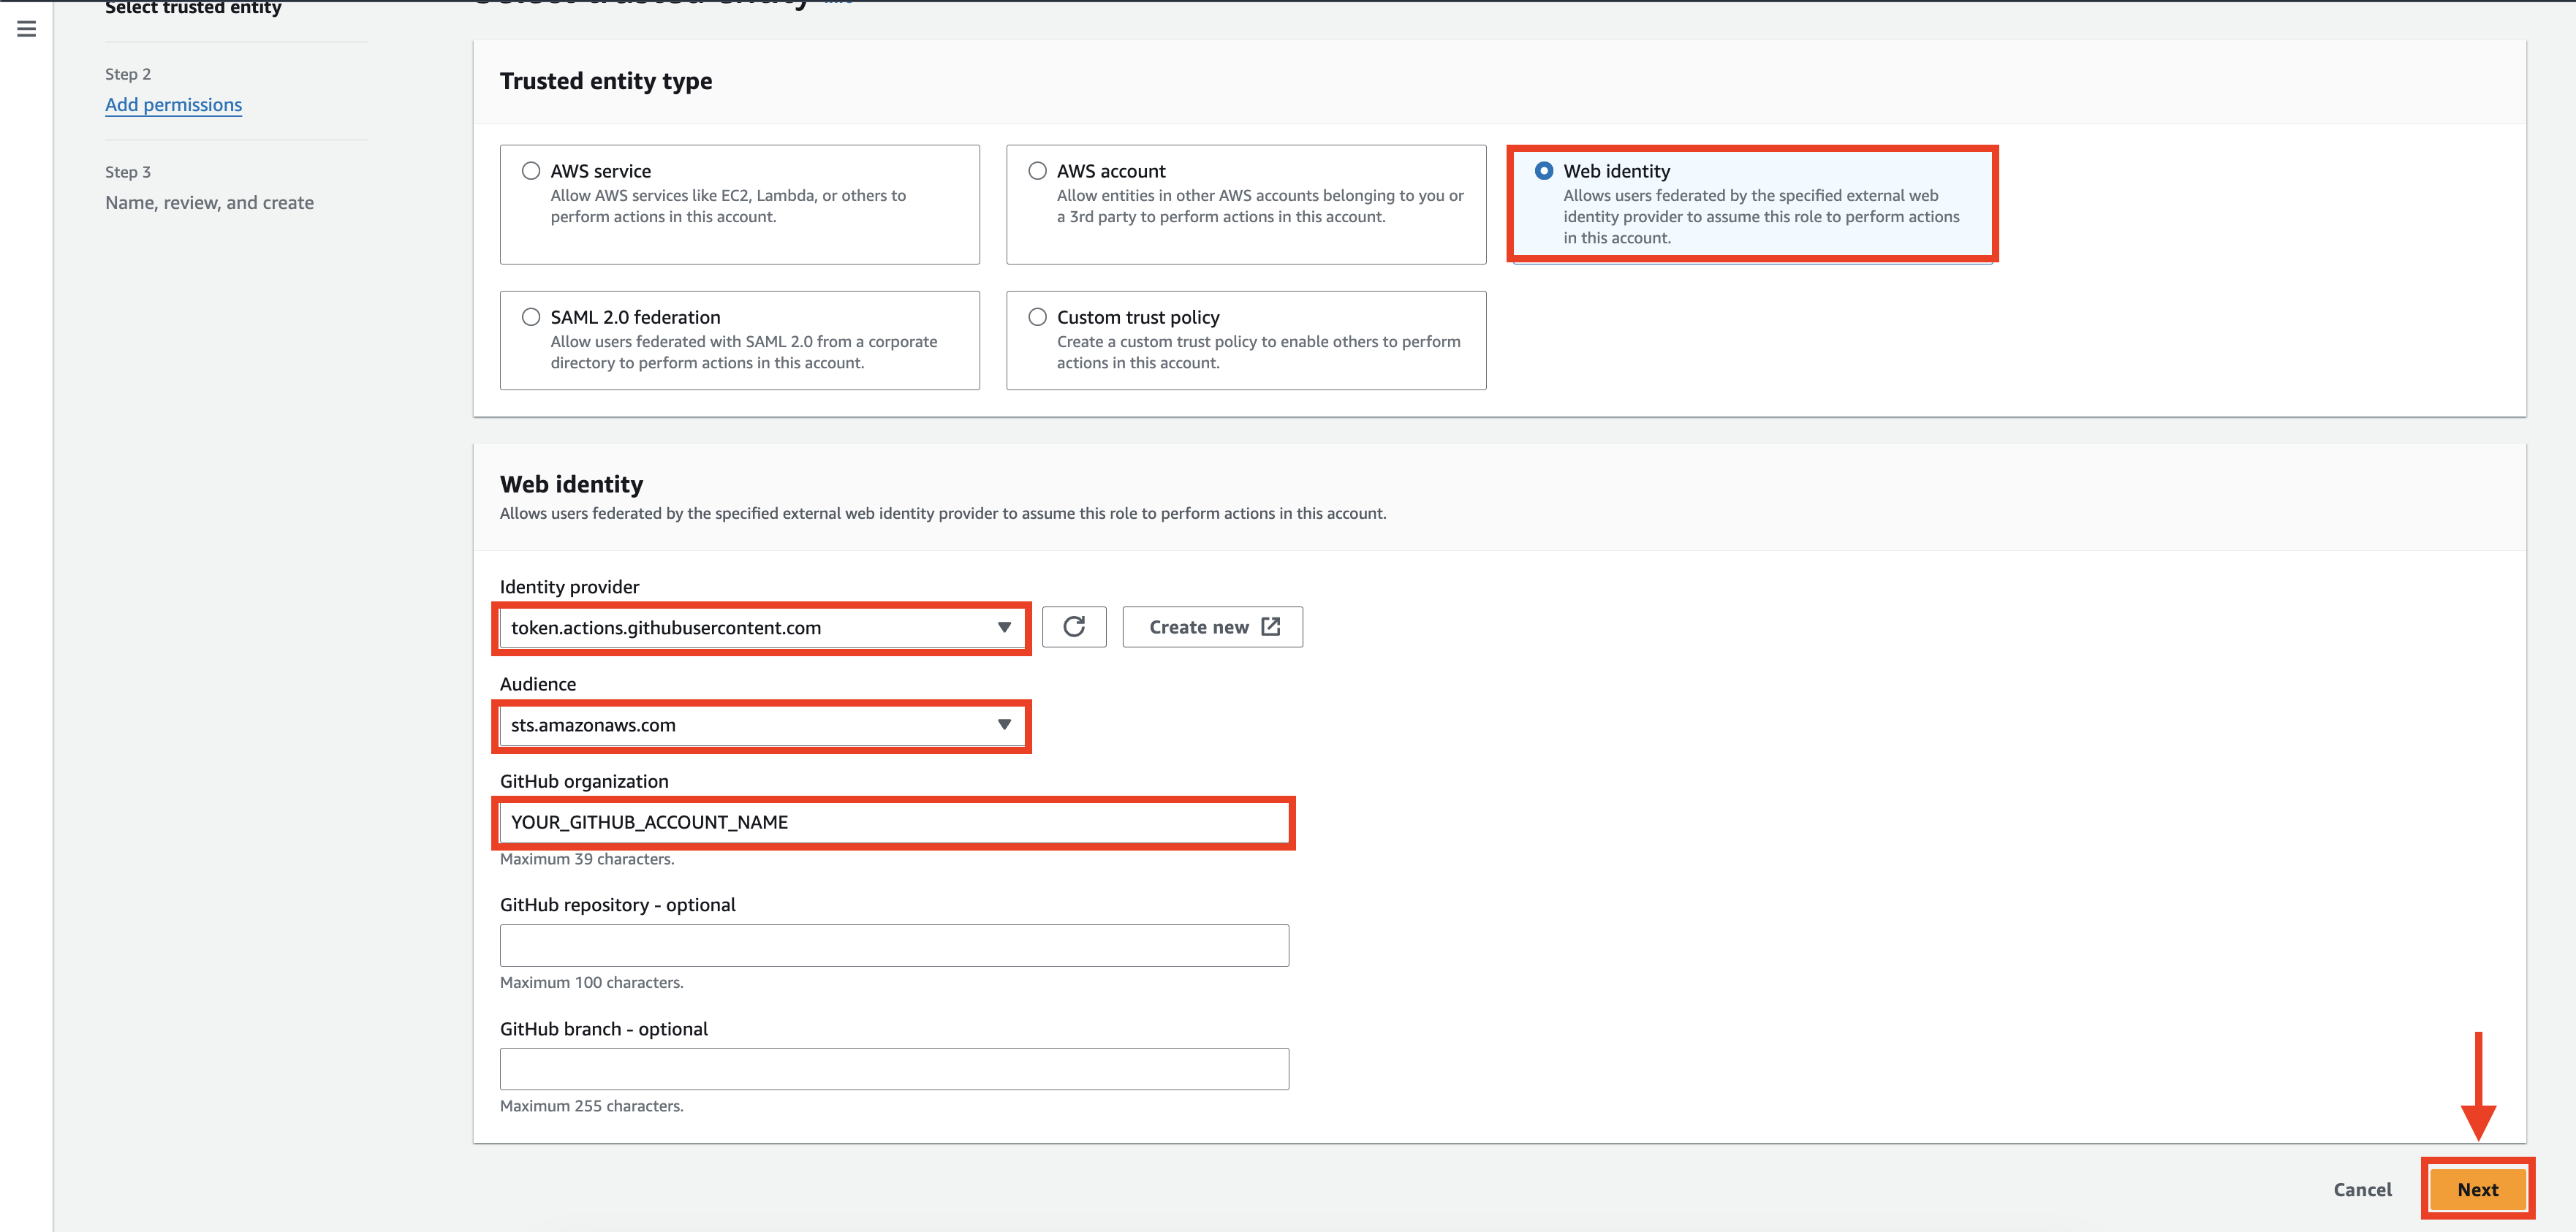
- At the Step 1
- At Trusted Entity type we choose “Web identity”
- At Web Identity:
- Choose Identity Provider
https://token.actions.githubusercontent.com - Choose Audience
sts.amazonaws.com - Github Organization: Fill your github username (This name is case sensitive)
- Click Next
- Choose Identity Provider
- At the Step 2 is AWS Managed Policy but we will create inline policy so we choose “Next”
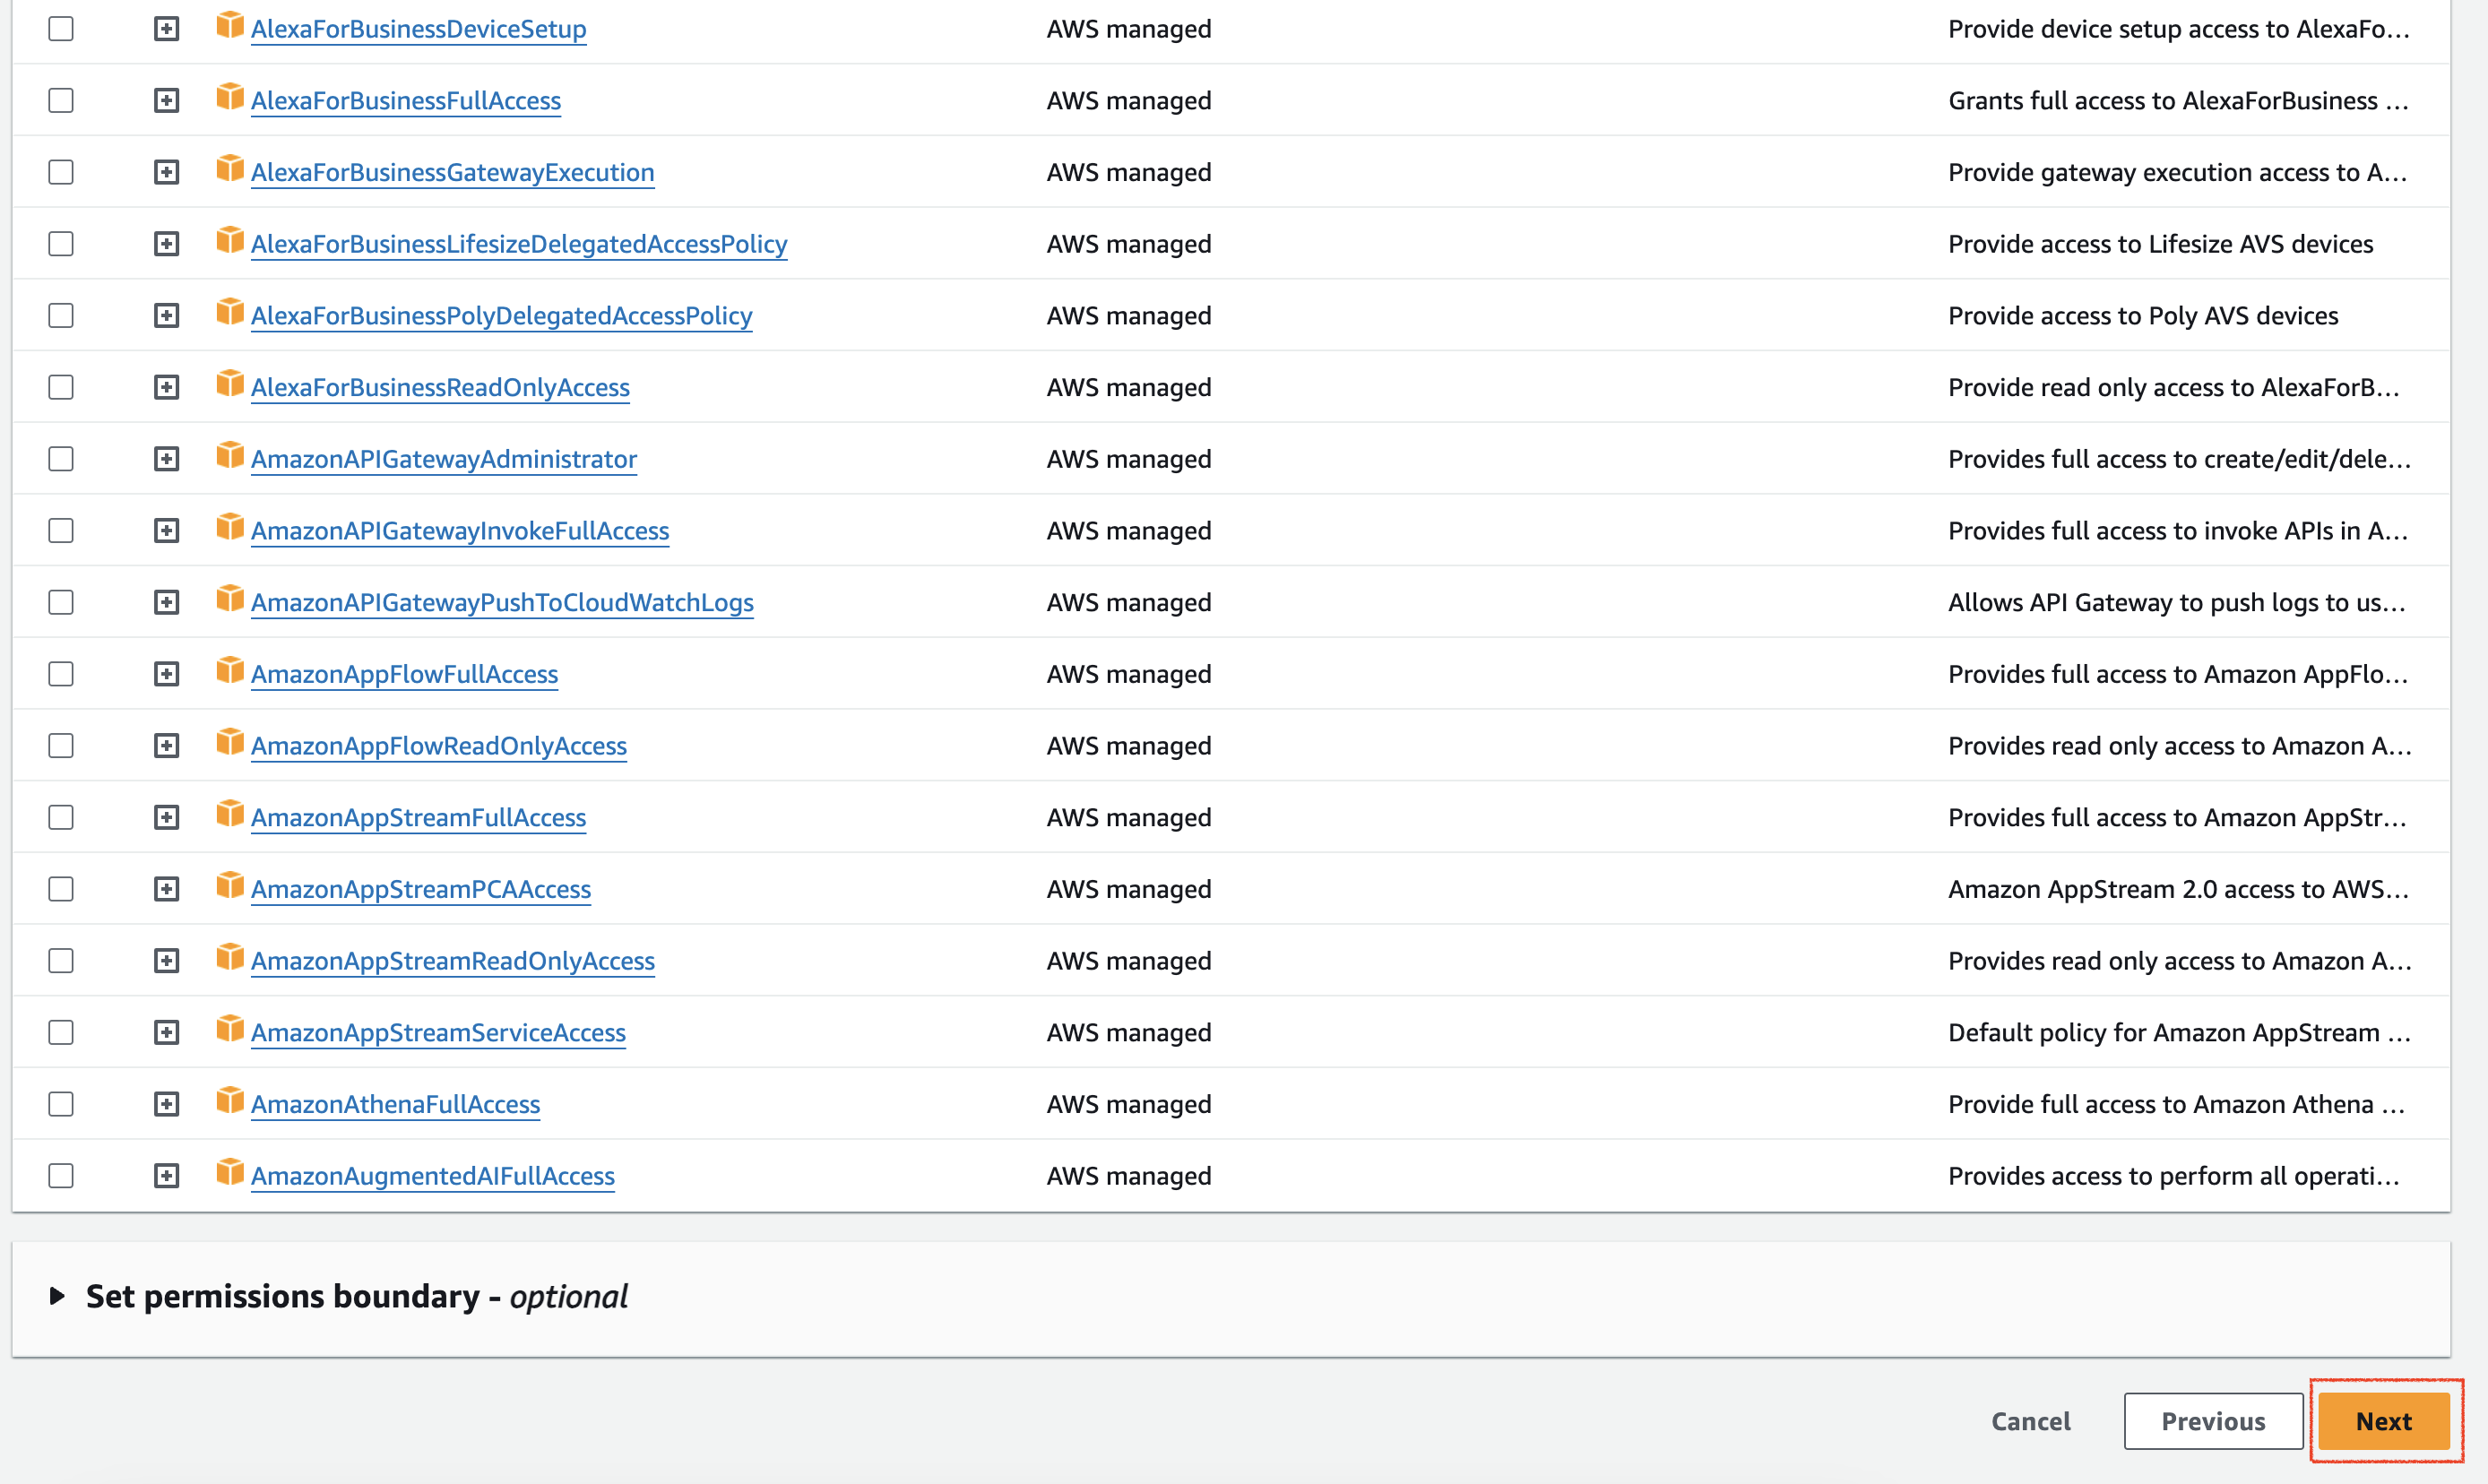
- At the Step 3 you will fill your role name like images and remember that role for later
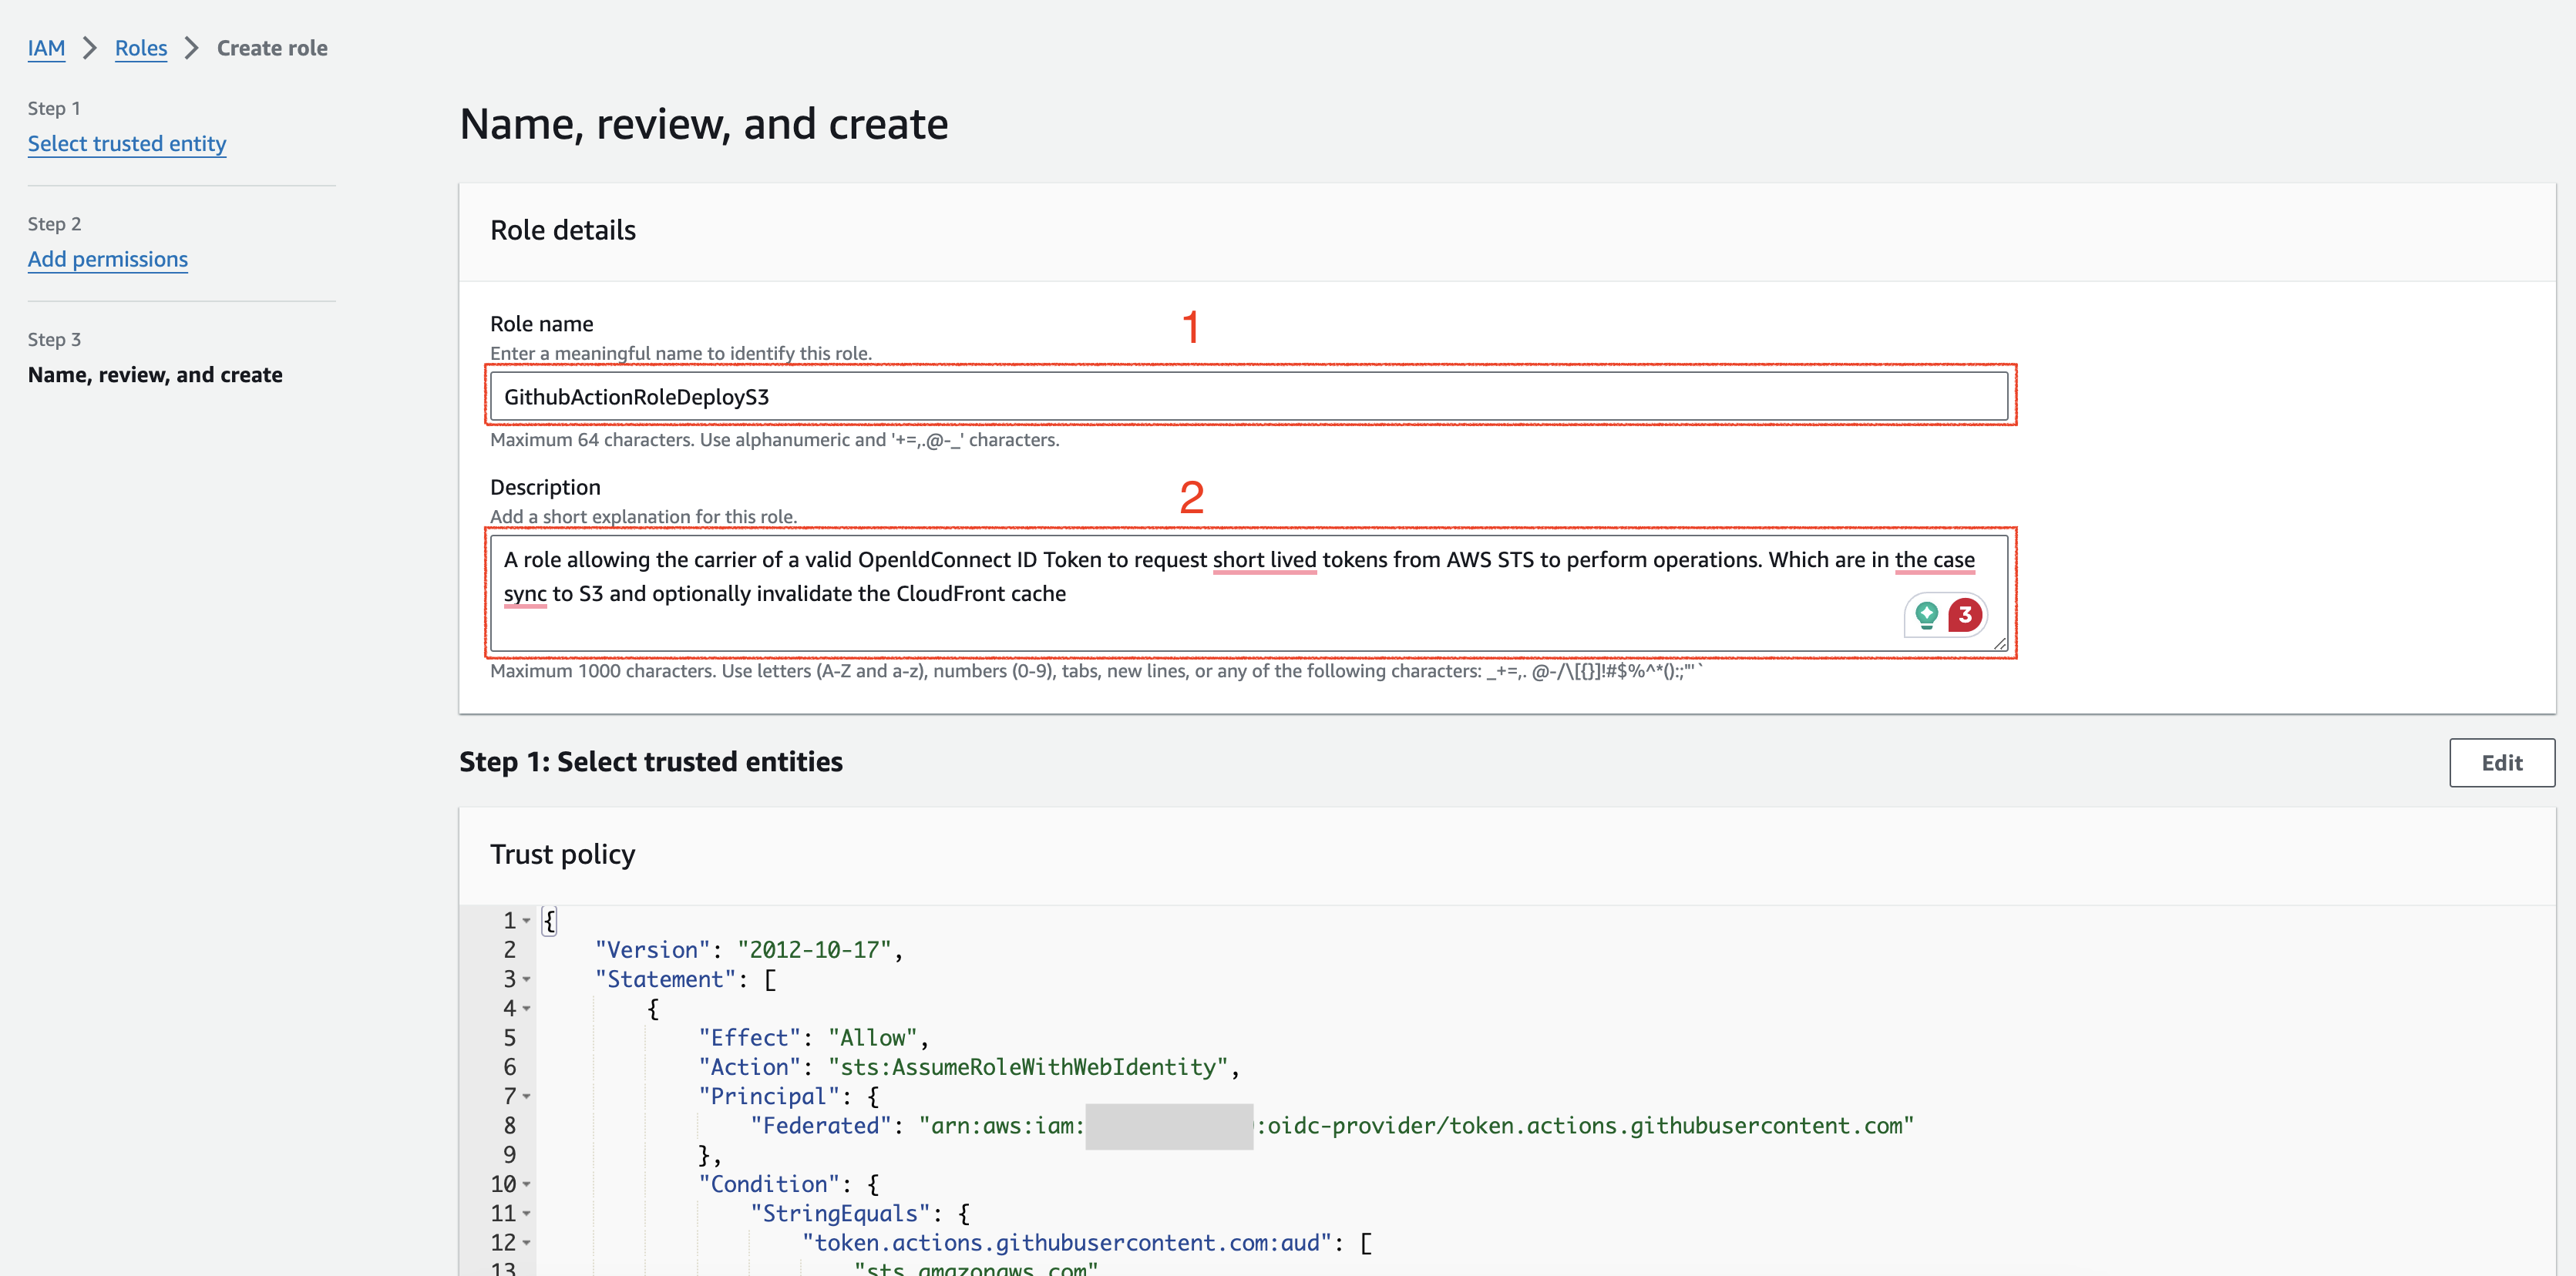
- Click “Create role”
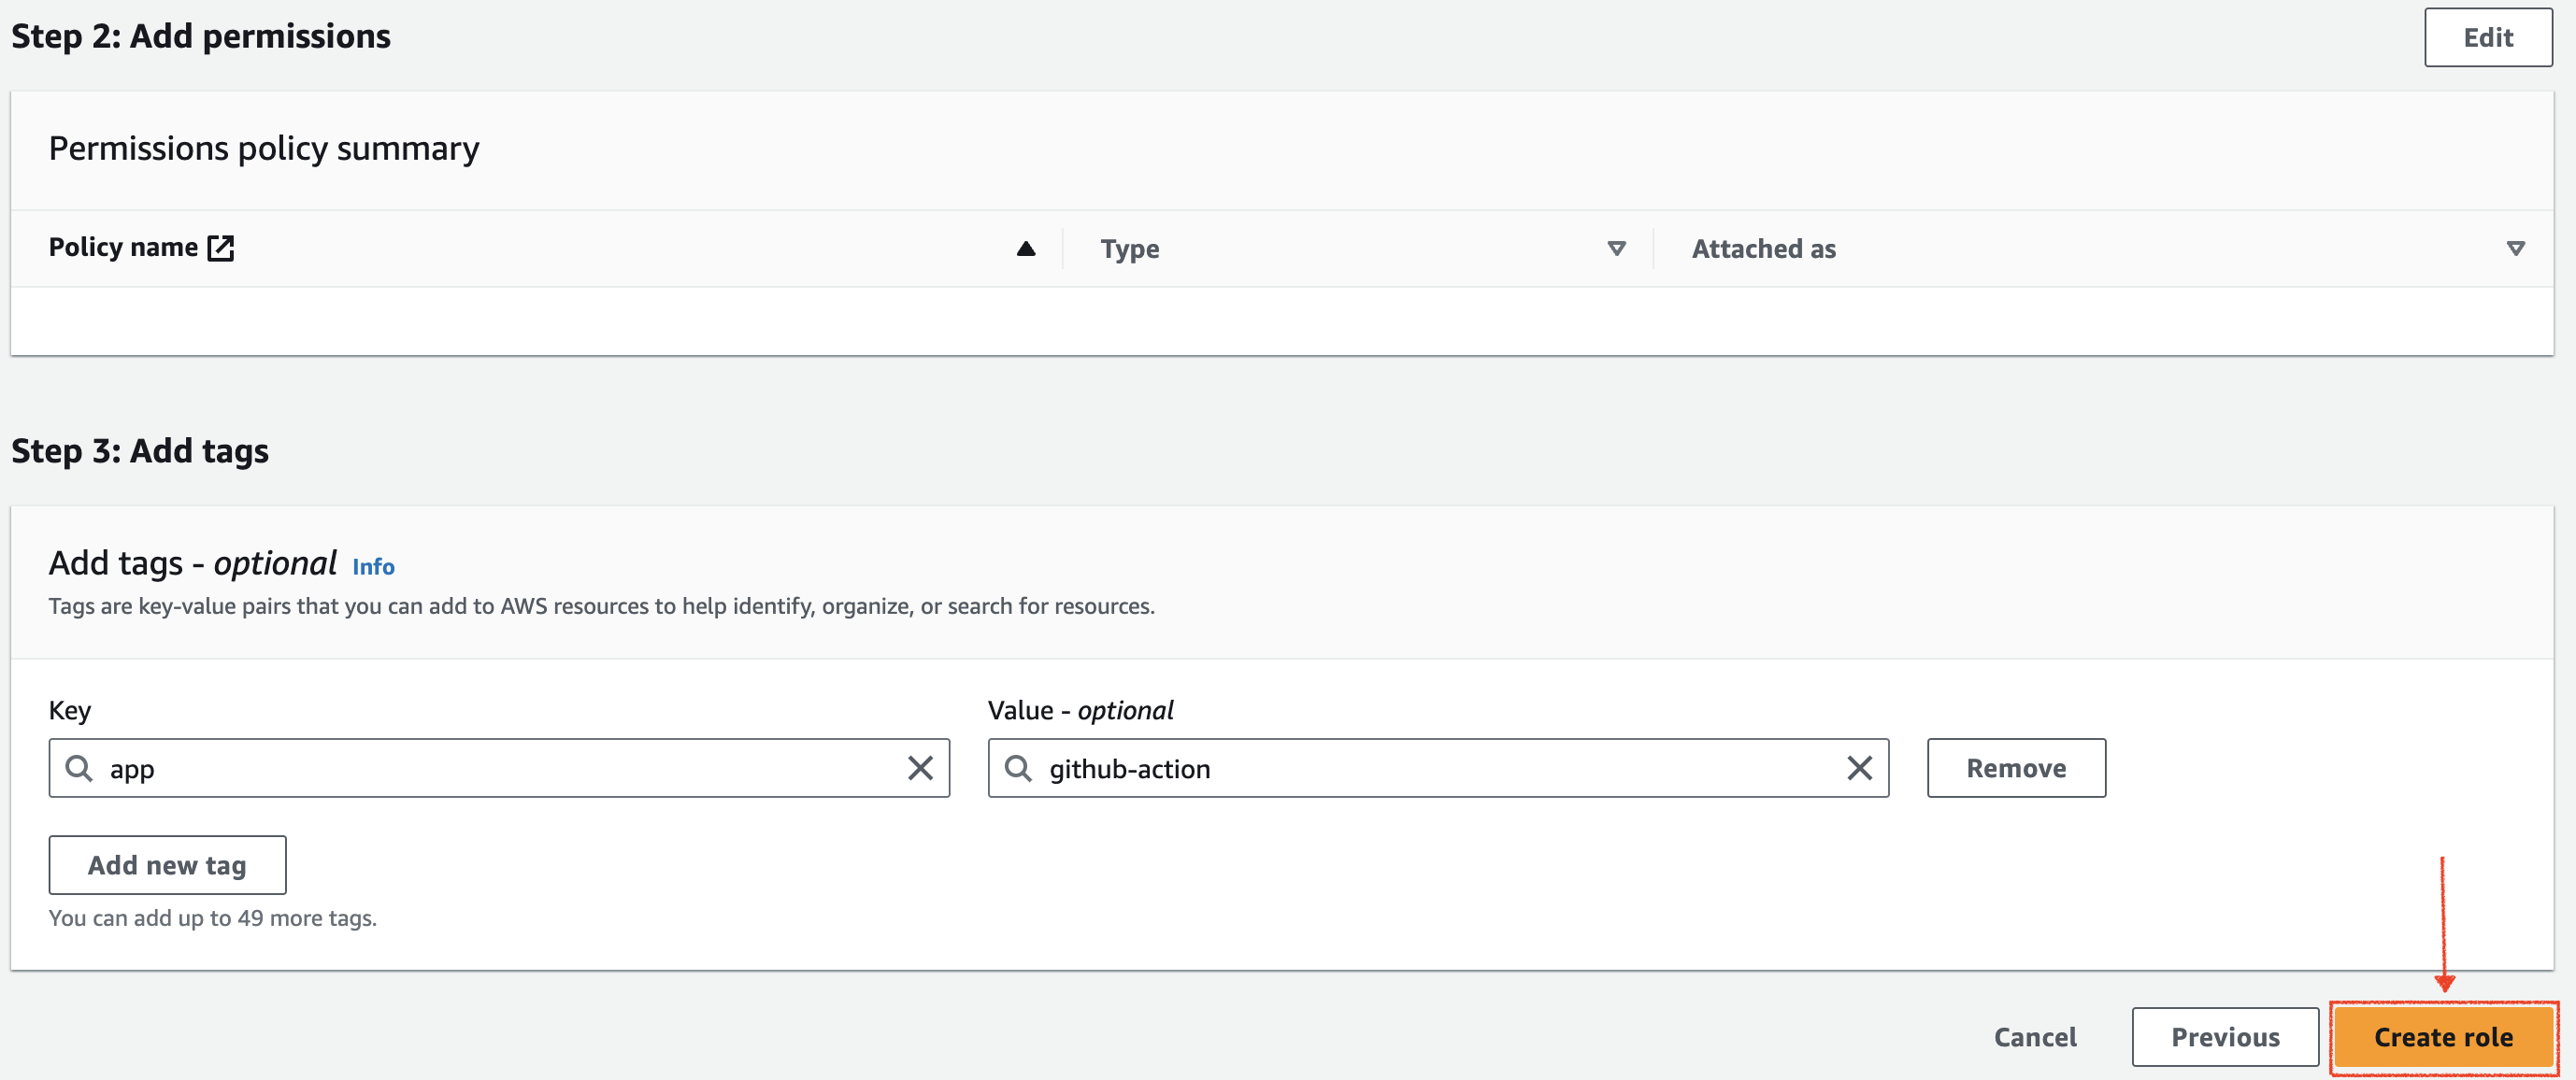
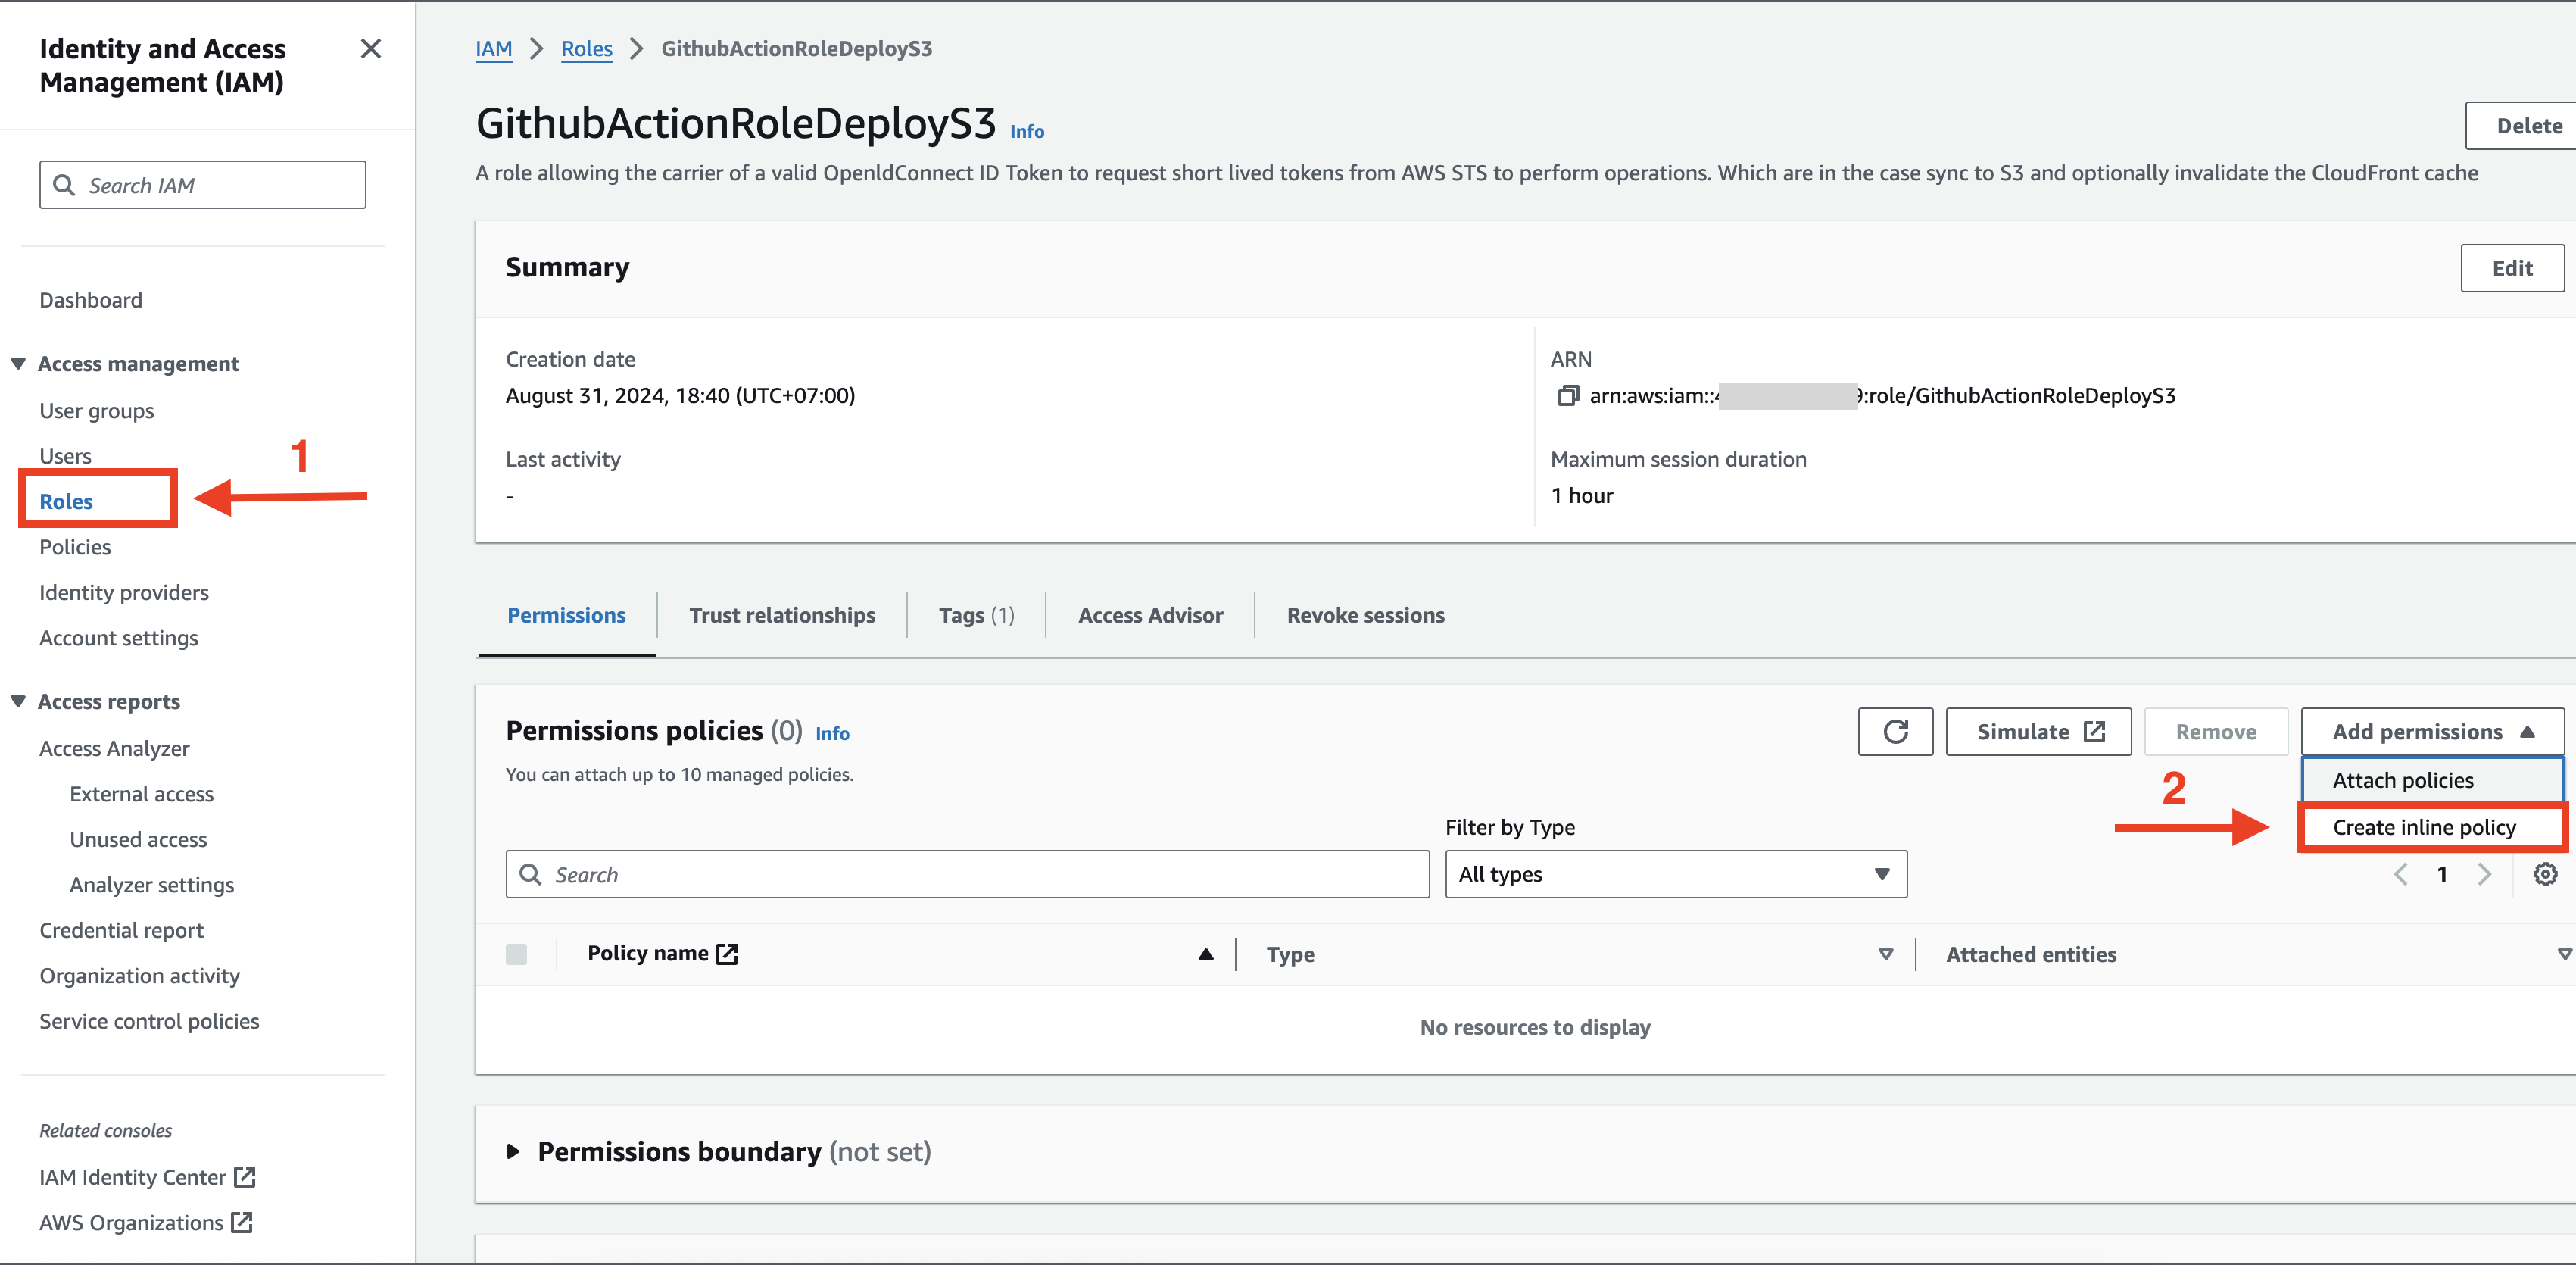
- At the left menu choose “Roles” -> Search your created role -> Choose that role
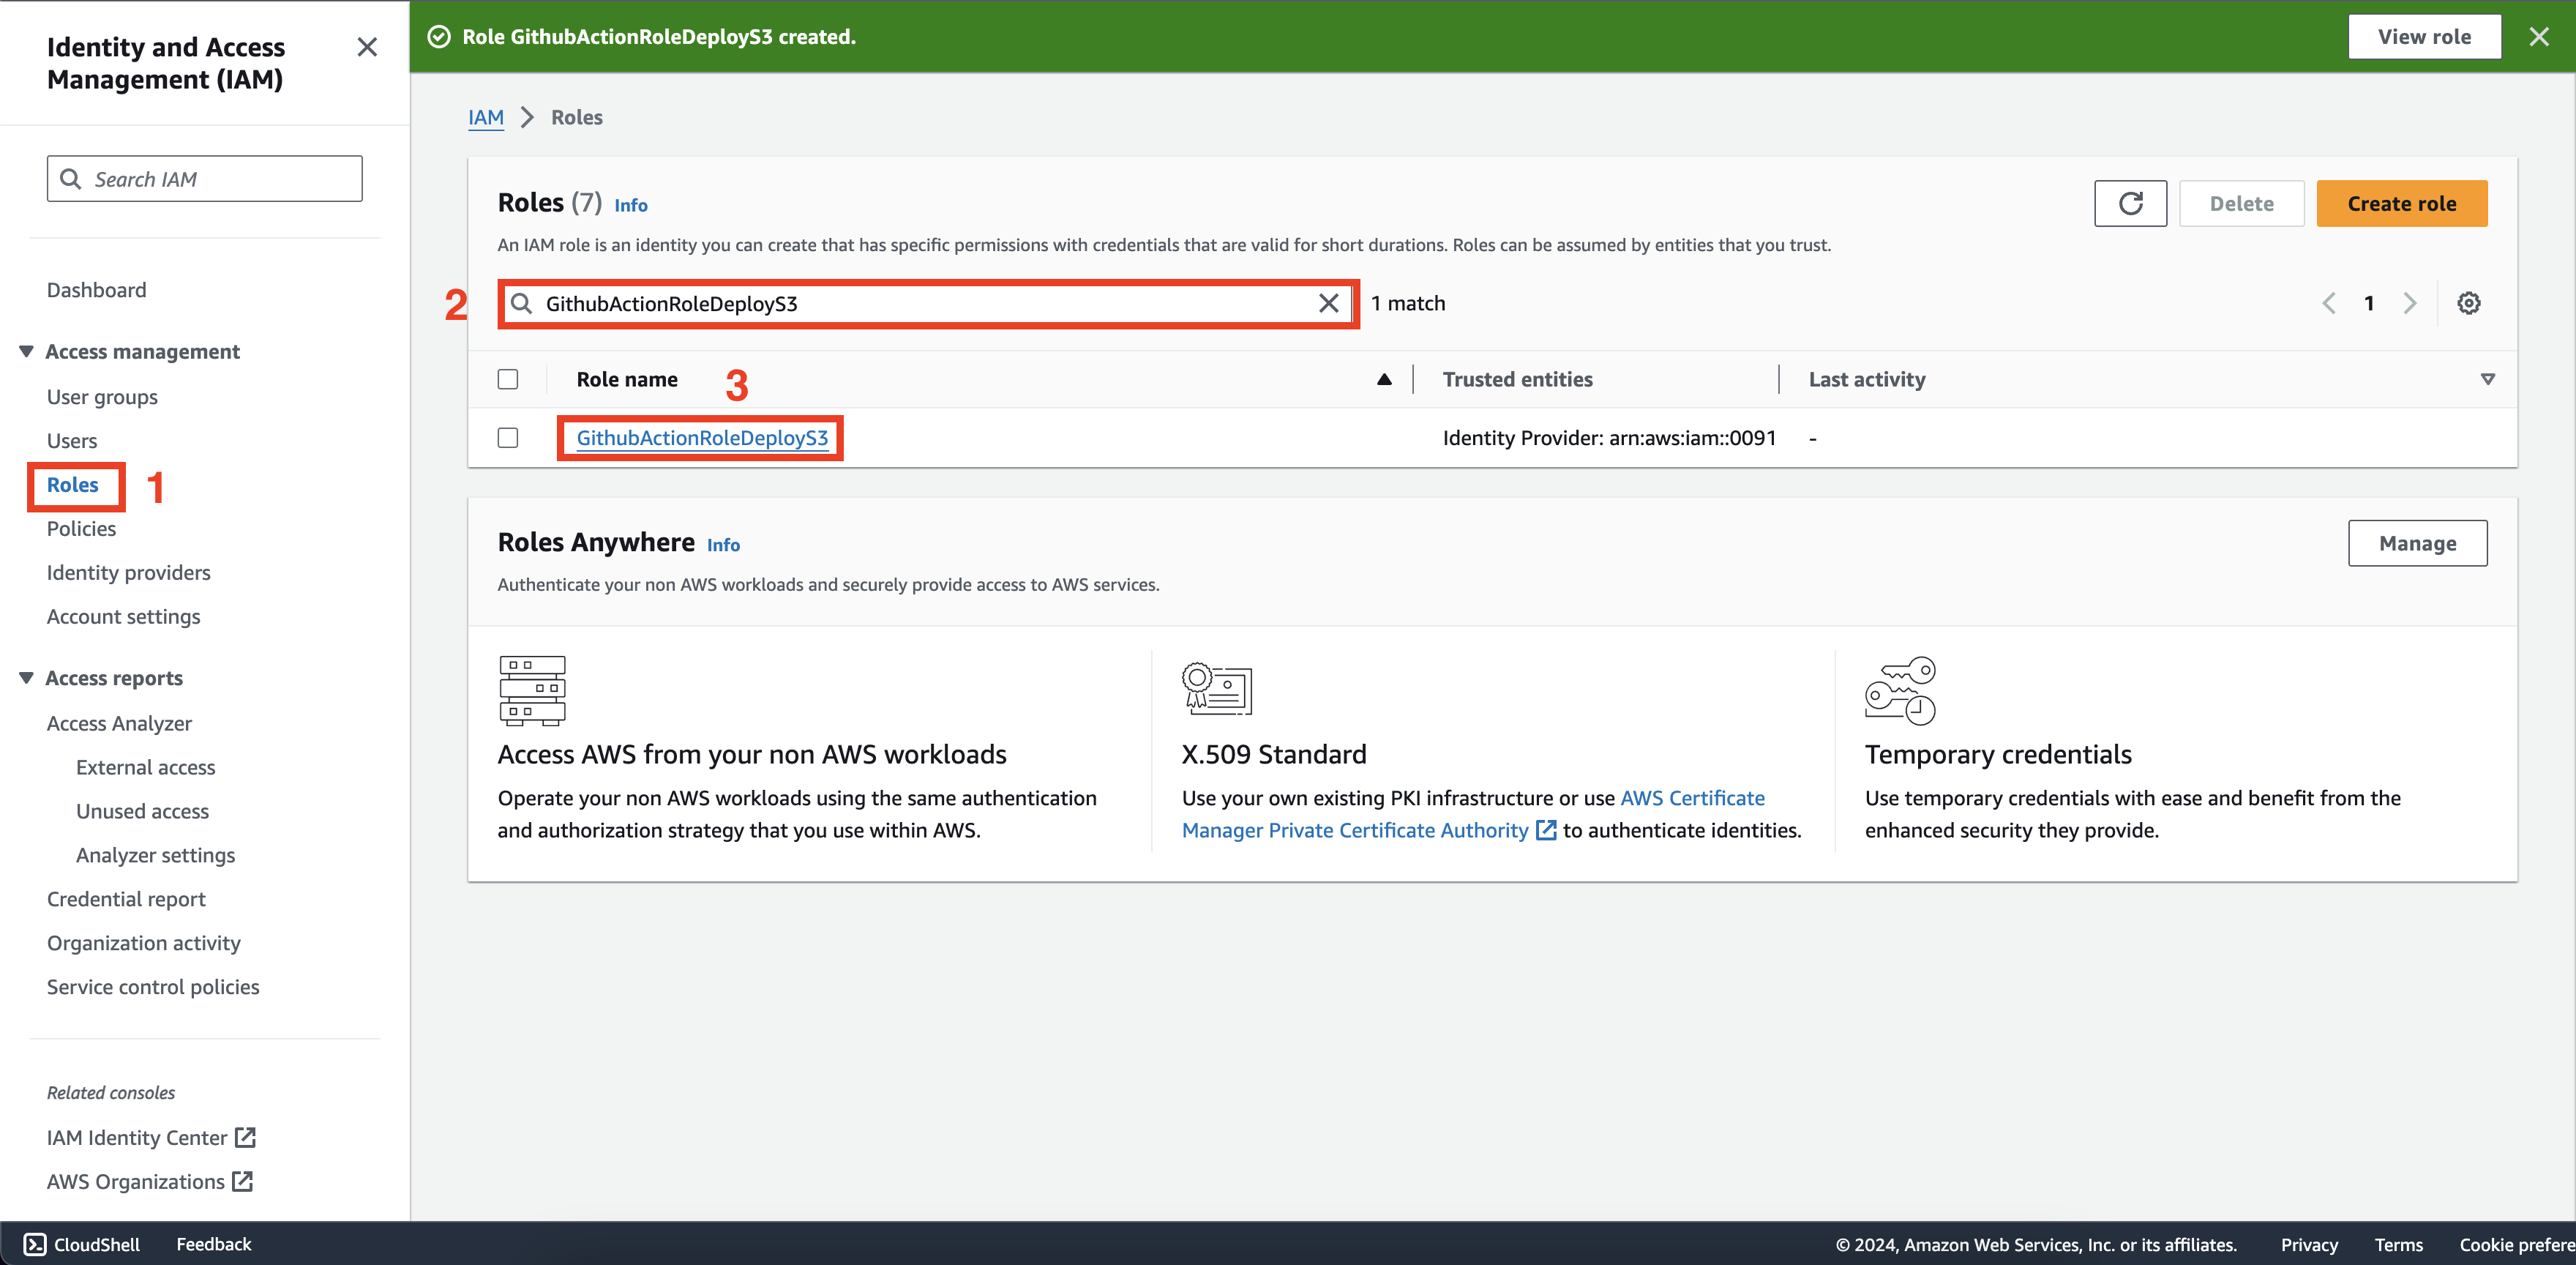
- At the Permission Policies -> Choose “Add permissions” -> Create inline policy
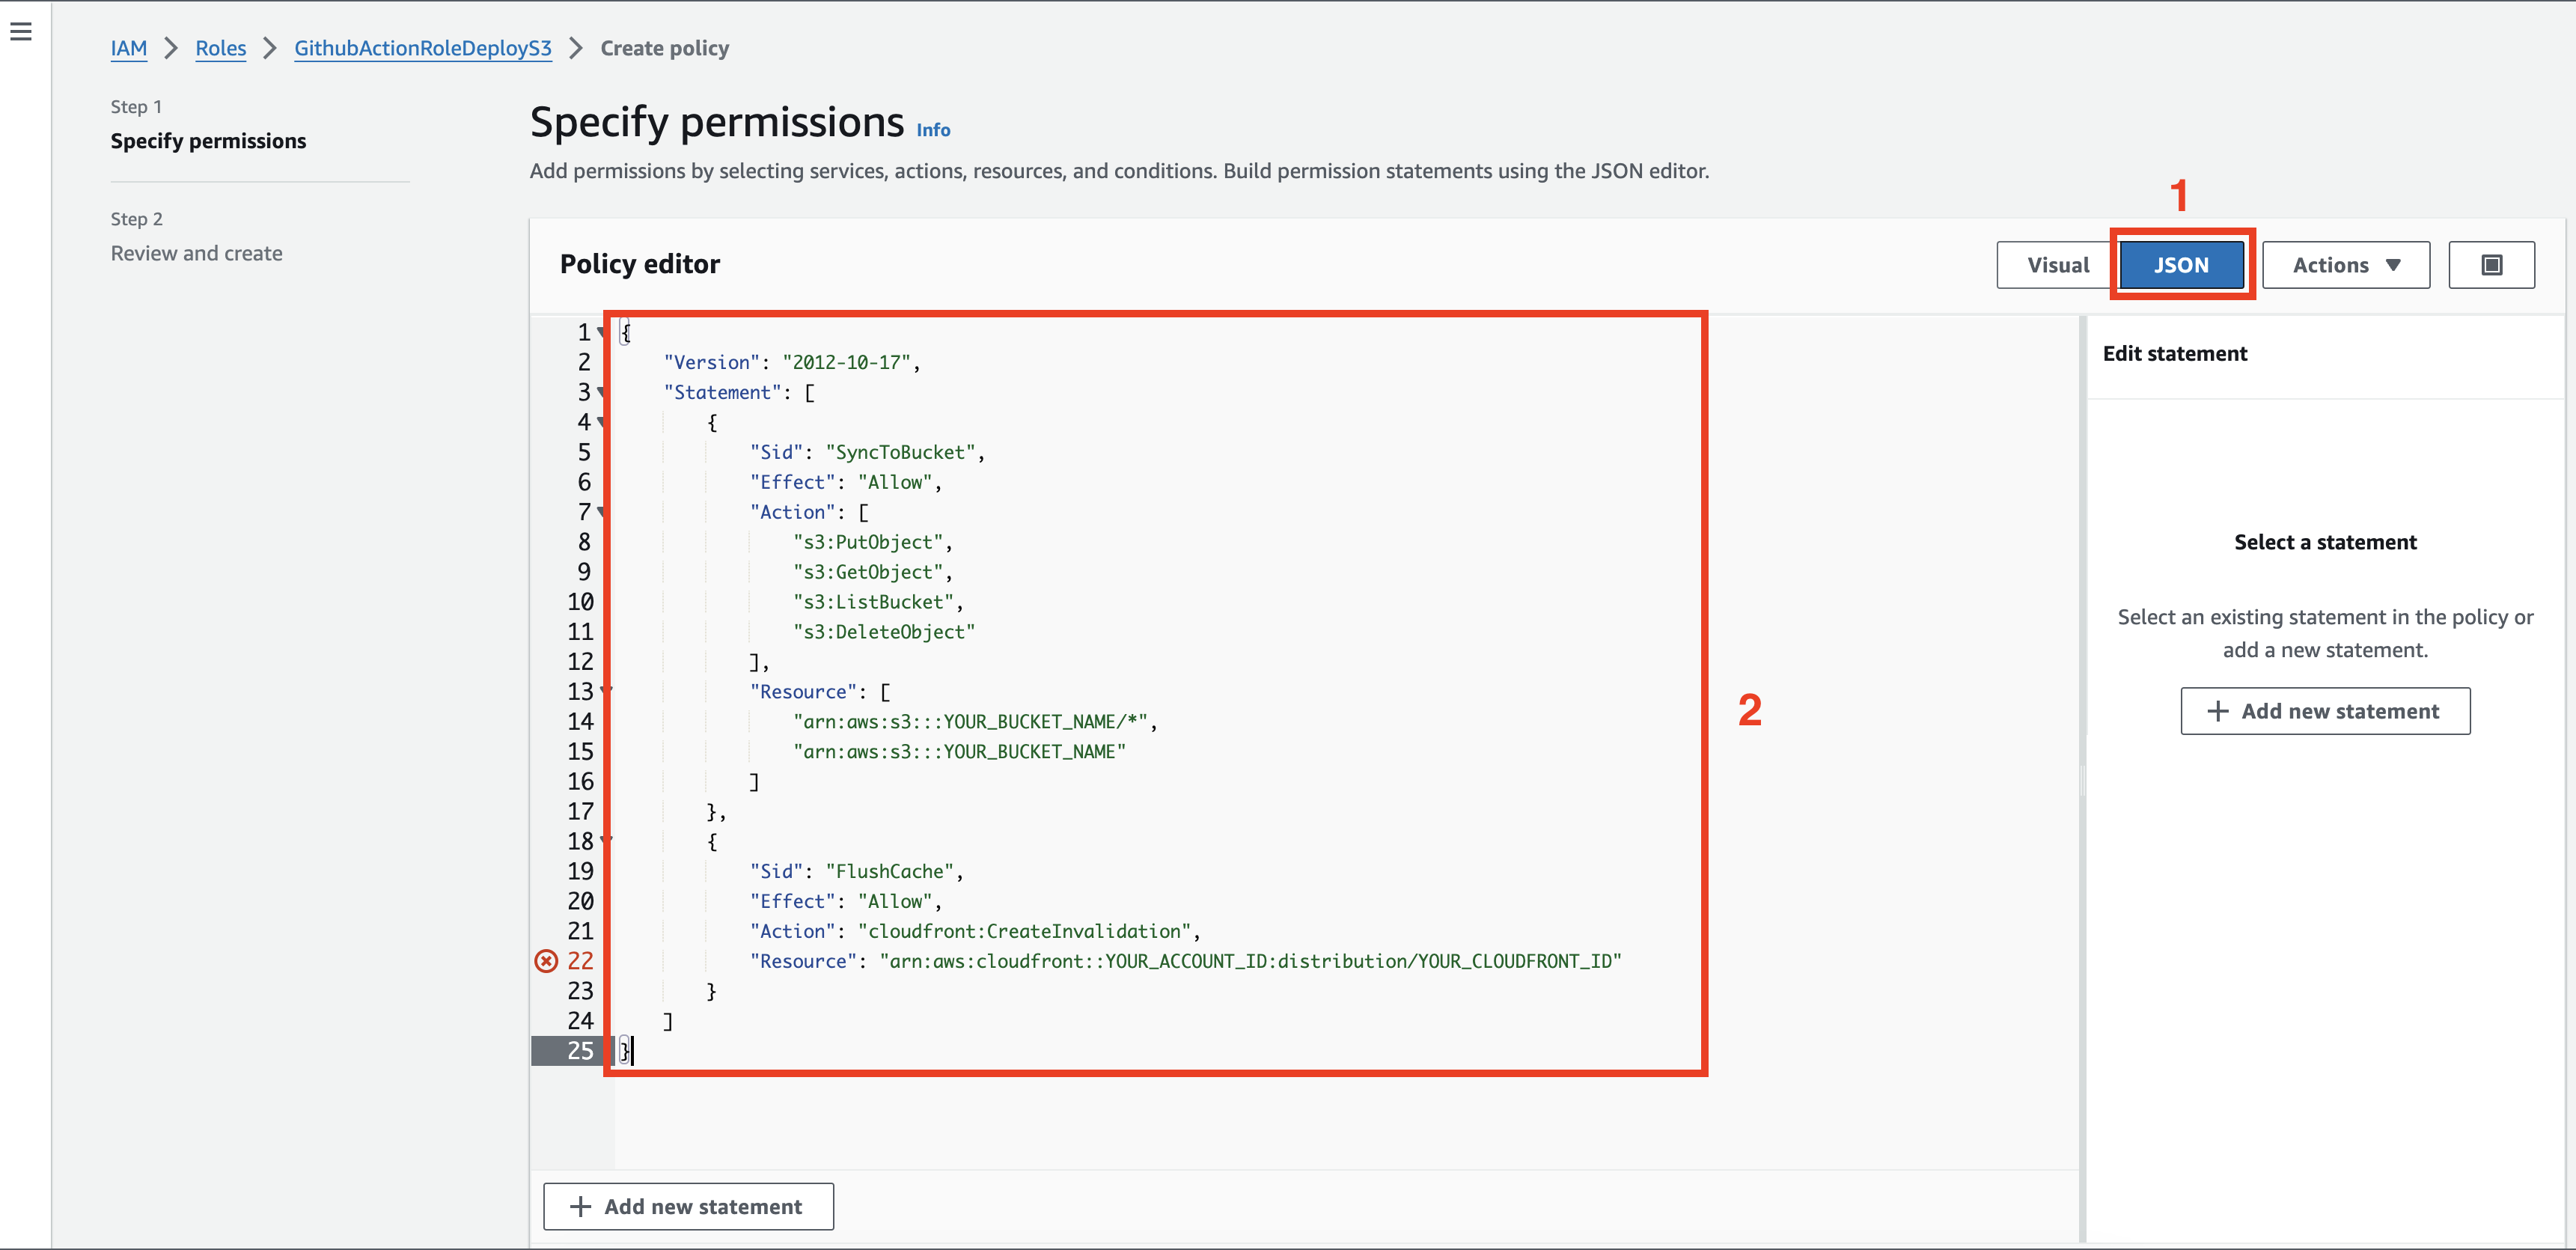
- At Step 1 choose JSON and copy paste the following policy (Remember change these ID for your case):
{
 "Version": "2012-10-17",
 "Statement": [
  {
   "Sid": "SyncToBucket",
   "Effect": "Allow",
   "Action": [
    "s3:PutObject",
    "s3:GetObject",
    "s3:ListBucket",
    "s3:DeleteObject"
   ],
   "Resource": [
    "arn:aws:s3:::YOUR_BUCKET_NAME/*",
    "arn:aws:s3:::YOUR_BUCKET_NAME"
   ]
  },
  {
   "Sid": "FlushCache",
   "Effect": "Allow",
   "Action": "cloudfront:CreateInvalidation",
   "Resource": "arn:aws:cloudfront::YOUR_ACCOUNT_ID:distribution/YOUR_CLOUDFRONT_ID"
  }
 ]
}
Then click “Next” -> “Save Changes”